Fluffy, Light, Not a Potato in Sight!
After taking every aspect of pastry into account I have concluded that Pâte a Choux is the Queen of all Pastries. Pâte a Choux is versatile and delicious in whatever form you find her. Eclairs, gougeres, cream puffs, Paris Brest, beginets. Whichever way she comes, I love her. I love making Pâte a Choux too. Harold Mcgee describes the technique for its preparation as tediously elaborate but I disagree. I become an alchemist in the kitchen when I make Pâte a Choux, giving thanks to the medieval chef who dreamt up such a peculiar way of combining a set of simple ingredients with magical results.
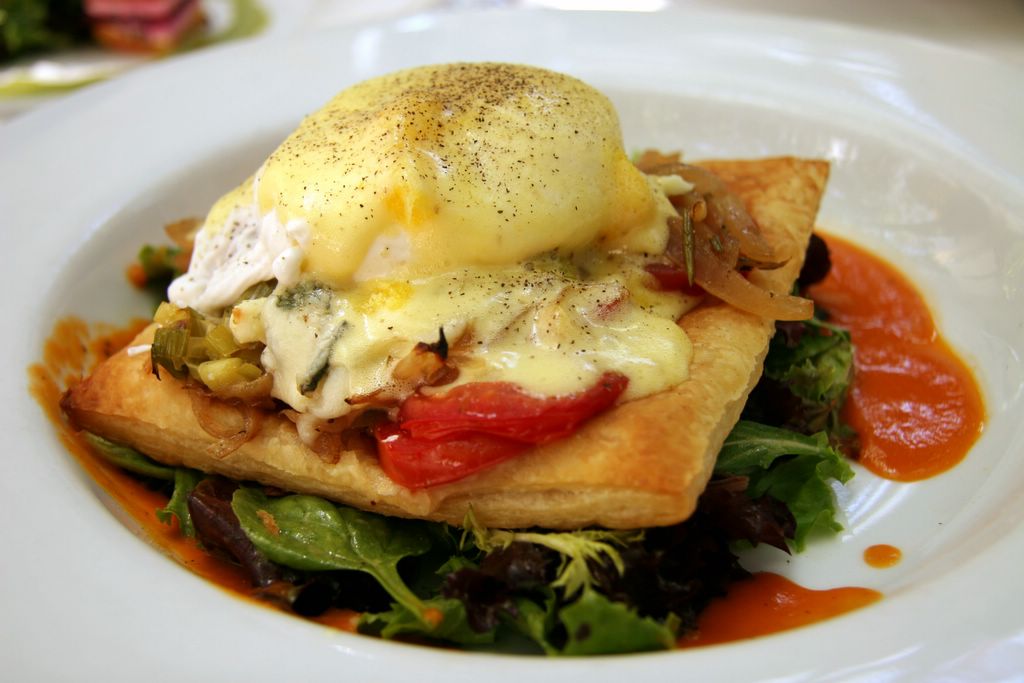
You are probably most familiar with choux pastry in its baked form, when it has been popped into the oven where it transforms into a puffy golden shell. But did you know that the very same dough can be gently poached to produce the softest, pillow-like, adorable, little gnocchi too? Forget the potatoes! Next time you desire a creamy carb-fest for dinner, simply turn to your pantry for some basic ingredients and whip up a batch of these super-satisfying, eggy, smeary, filling, irresistable French-style gnocchi. Recipe below. Ooh la la!
Disclaimer: I know I suggested they were light, but that's kind of misleading. They seem light at first bite, but after two or three they get heavy pretty fast, especially if you drown them in a rich fatty sauce. You have been warned, they are not diet friendly, but they are worth it...
Basic Gnocchi Recipe:
1 2/3 cups of whole milk
6 oz or 1.5 sticks of unsalted butter
3/4 teaspoon salt
1 1/3 cups of all purpose (plain) flour
4 or 5 eggs
Method:
- Read through all the instructions before you start this recipe.
- Line a couple of baking sheets with parchement paper and put them to one side.
- Measure and sift the flour into a jug or other container suitable for quick pouring.
- Have a wooden spoon at the ready.
- In a heavy saucepan gently heat the milk, butter and salt until the butter is melted and then bring to the boil.
- Take the pan off the heat and immediately pour all the flour at once into the milk and start beating all the ingredients together vigorously with the wooden spoon.
- After about a minute the dough will come away from the sides of the pan and form a ball of sorts. When that happens you can stop beating.
- If you have an electric mixer then put the ball of dough into the bowl of the mixer and leave it to cool for five minutes. If you don't have a mixer, a wooden spoon will suffice, tranfer the dough to a mixing bowl and rest those biceps for five minutes.
- Whilst the dough is cooling, fill a large pan with water, salt it well and bring it to the boil.
- Back to the dough. Adding one egg at a time, beat thoroughly to fully incorporate each one into the dough before adding the next one. Four eggs should be enough, but if you find that your dough is still very stiff and dry then beat in the extra egg.
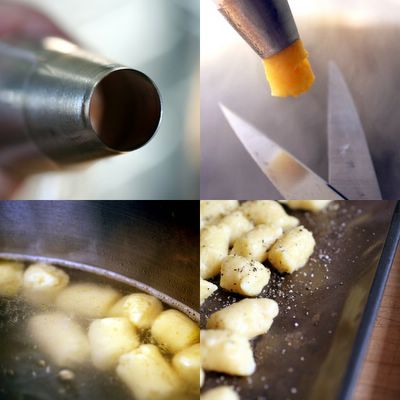
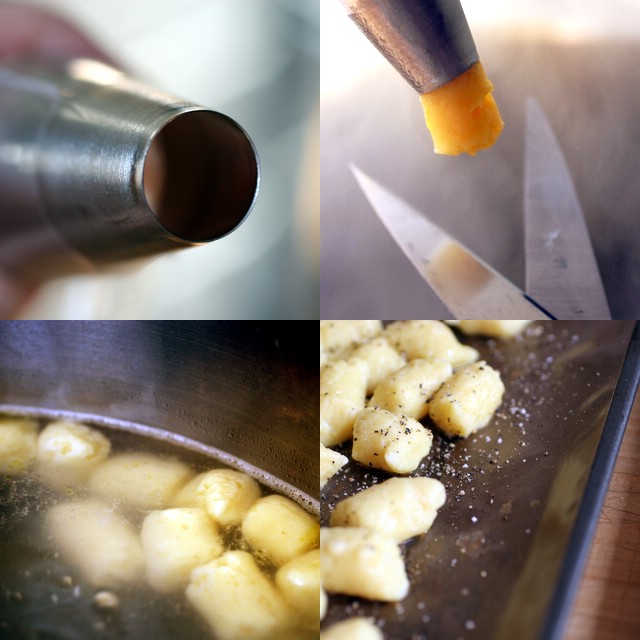
- The next stage is to transfer your dough into a piping bag with a large, plain nozzle. It is easier to work in batches. I split the Pâte a Choux into three batches when working with this amount of dough.
- Adjust the pan of water to a gently rolling boil. Have a pair of scissors ready. In one hand hold the the piping bag and as you pipe the dough into the water, quickly snip them off into pillow shapes. The water will splash so if you have heat sensitive hands it might be an idea to wear protective gloves.
- The gnocchi take about five minutes to cook and will be ready when they float to the surface. Remove them with a slotted spoon and lay them out to dry on the baking trays. Repeat the process for the reamaining batches of dough.
- Liberally season with salt and freshly cracked black pepper
What Next?
The gnocchi will be good for a couple of days, refrigerated in this state, but they need to be baked with a sauce of your choice before serving. Bake in a preheated 425F oven for 10 - 20 minutes (Depending on whether you let the sauce cool or not first), with a few extra minutes under the broiler to brown the top.
Creamy sauces, tomato sauce, ragu or a meat sauce - all of these will work well with these gnocchi. Use your imagination! Here are a couple of sauces I have tried successfully...
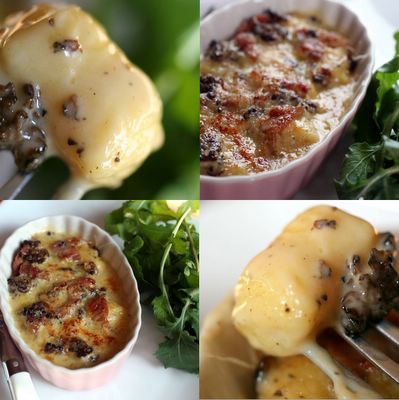
Triple creme, Pancetta and Morel sauce:
For the sauce in the picture I pan-fried together a quarter of a pound of pancetta and a quarter of a pound of sliced morel mushrooms. When they were golden I took them off the heat and poured out all the excess fat. I then scooped out the centre of a half-pound triple-creme cheese and added that to the pan together with 1 1/2 cups of whipping cream. I simmered the ingredients together until thickened. I checked seasoning and added plently of black pepper. As the pancetta was salty I didn't need to add extra salt. I mixed this sauce with the gnocchi, tranferred to gratin dishes, topped with grated parmigiano and baked at 425F for twenty minutes until golden. (Finish under the broiler/grill if necessary.)
Blue Cheese Cream Sauce:
For a blue cheese sauce bring 5oz blue cheese of your choice, black pepper and 1 1/2 cups of heavy cream to the boil and then reduce to a gentle simmer until the sauce thickens and is reduced by a quarter of its volume. Combine with the gnocchi as detailed above. You can use one large gratin dish for baking, or smaller ramekins.
I took the gnocchi to a partially French-centric pot luck party last night. Although my French friends weren't familiar with their own brand of gnocchi, I don't think they are going to waste any more time before adopting it as their own.

Food |
Eat Local |
French Cooking |
San Francisco |
Bay Area |
Gnocchi |
Cooking |
Recipe
How to Make Gnocchi - Parisienne, French Style


 (Click on Letter to Open/Close Index)


 marin
marin east bay
 wine country
 davis
davis tahoe
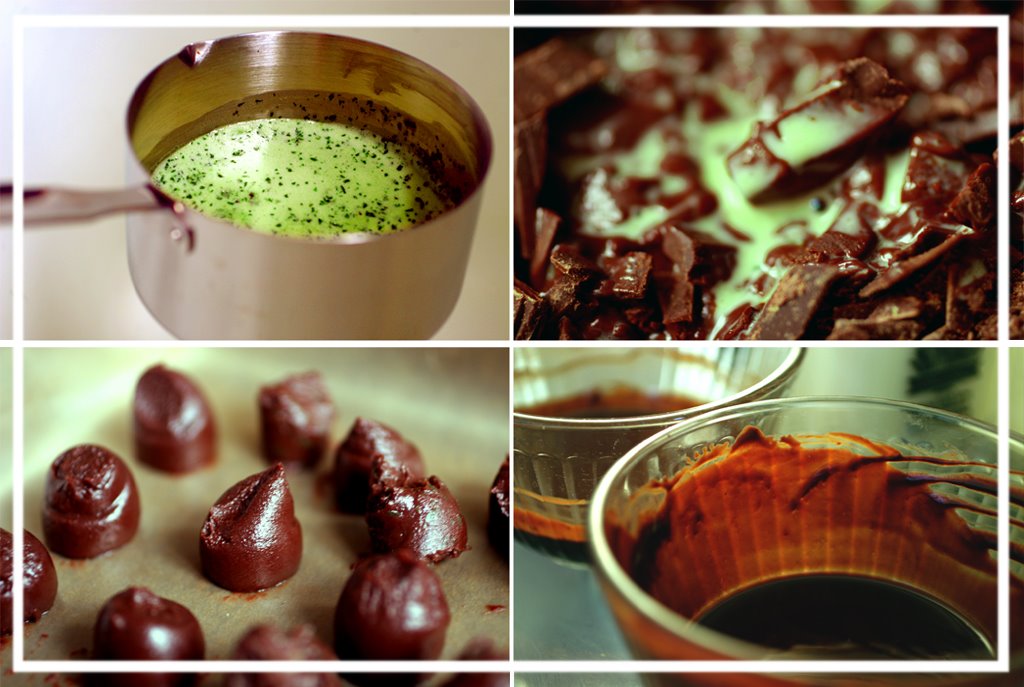
tahoe baked
baked chocolate
 dairy/eggs
 drinks
 markets
 meat
meat new york
 las vegas
 los angeles
 san diego
 england
 fiji
fiji france
 ireland
 nibbles
 staples
 salads
 sarnies
 vegetables
 pasta/grains
 eggstras
 fishes
 meat
meat dough
dough desserts
 cakes/cookies
 sweets
 feasts
 english
 drinking out
 bubbles
 white wine
 red wine
 pink wine
 hard stuff
 soft stuff


